Advanced Search
Advanced Searches return any results that match your selected criteria. Those results can be printed as a PDF document or as an Excel spreadsheet. In Incident, an Advanced Search can also be set up as a Saved Action, allowing you to easily run the search again in the future. Saved Actions can also be set up to automatically generate and email the results to multiple email addresses on a regular basis.
How to Run an Advanced Search
- Click on the Advanced Search link located next to the Search For box in the upper left hand corner of the page.
- The Advanced Search defaults to the Incident Search. To search for Assets, Transactions, or the Knowledge Base, hover your mouse over the Shortcuts menu and click on the appropriate link.
_239x174.png)
- On the Advanced Search page, you will see the possible filter selections. (Locations, Status, Problem Type, etc.) You can select any combination of items from each of the fields. You can also select multiple items from within some of the fields by holding down the CTRL key on your keyboard. The more items that are selected, the more specific your search will be. *Note: When selecting multiple items from a criteria box, the "Include All" option should not be highlighted.
- Under the criteria boxes, you can identify a date range for the search from the Custom Period drop down box or by entering a specific begin and end date. A date range is not required when running an advanced search. *Note: There are six different "types" of dates to search by: Incident Date, Requested Completion Date, Target Start Date, Target Completion Date, Completion Date, and Date of Last Status Changed.
- Click the Search Now button at the bottom of the page. Your results will display on the screen and you will have to ability to print this page to PDF or Excel by using the icons at the bottom left of the list.
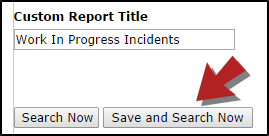
- To save an Advanced Search to use as a Saved Action, enter a Custom Report Title at the bottom of the screen and click Save and Search Now.

